
Hola!! Hi!!
Después de un finde movidito pero muy familiar y divertido, no podía empezar esta semanita mejor que con un Blog Hop en el que las DT de Linnie Blooms hemos tenido ocasión de colaborar con Faber-Castell... sí, como lo oyes: Faber-Castell!! Cuando me lo comunicaron no podía dejar de aplaudir con las orejas... seguro que sabrás de mi aficción al mundo Mixed Media y, por tanto, de mi pasión por los Gelatos!!
Can you think of a better way to start the week than with a Blog Hop with Linnie Blooms and Faber-Castell? I love Mixed Media art, and yes, I feel passion for Gelatos... Love working with them!

Asique, tras horas de diversión y de probar distintos productos, este es mi proyecto, espero que os guste... yo he disfrutado como una cría haciéndolo!
So, after hours of fun and trying different products, here is my project, I hope you like ... I enjoyed as a kid!

Paso a paso / Step by Step:
1.- Haz tu propio fondo usando los Gelatos, pinta con ellos sobre la bandera de canvas y despúes pulveriza agua para poder mezclar los colores entre sí.
2.- Una vez hayas obtenido el fondo que más te guste, déjalo secar para poder seguir trabajando sobre él.
1.- Haz tu propio fondo usando los Gelatos, pinta con ellos sobre la bandera de canvas y despúes pulveriza agua para poder mezclar los colores entre sí.
2.- Una vez hayas obtenido el fondo que más te guste, déjalo secar para poder seguir trabajando sobre él.
1. Do your own background using Gelatos, paint with them on canvas flag and then spraying water to mix colors.
2. Once you've got the background you like, let it dry to keep working on it.
2. Once you've got the background you like, let it dry to keep working on it.

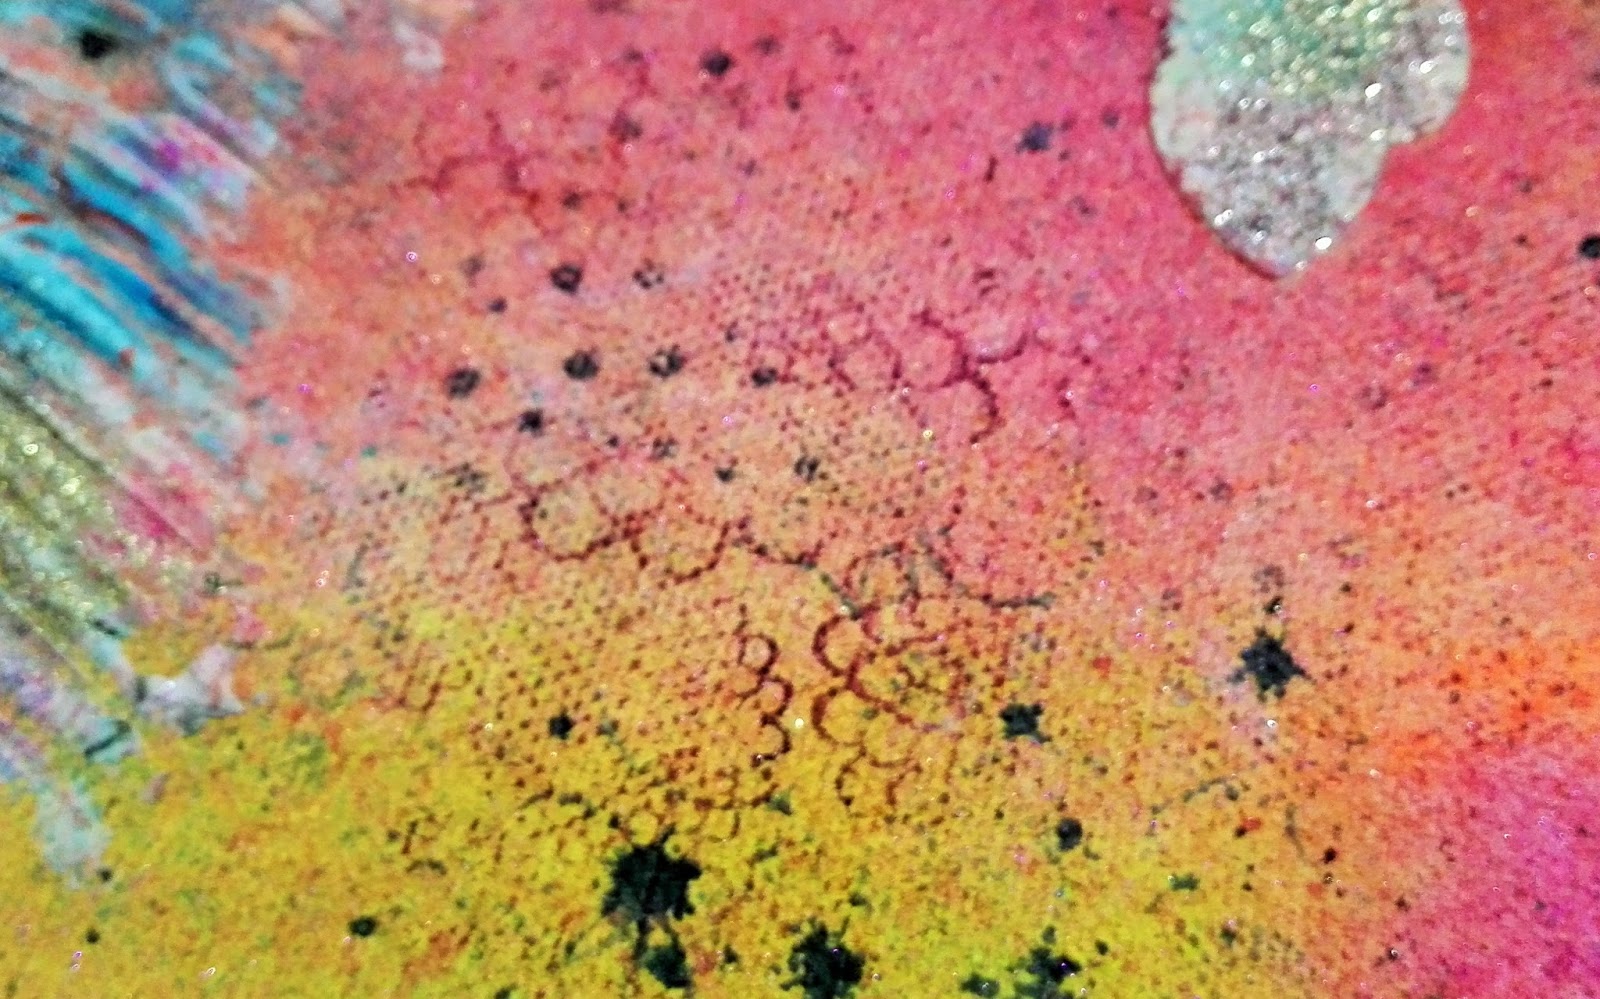
3.- Añade texturas, usando para ello usa la pasta de modelar de FC y diviértete dándole forma con las tarjetas de textura y tus stencils. TIP: una vez aplicada la pasta, espolvorea polvos de embossing sobre ella y dales calor con el secador de embossing, el efecto final es total!!
3. Add textures, for it use Whipped Spackle of FC and have fun with Texture Cards and your stencils. TIP: once applied Whipped Spackle, sprinkle embossing powder on it and give heat with embossing dryer!


4.- Utiliza el Big Brush de FC para pintar tu sello favorito de fondo y estámpalo repetidamente sobre tu fondo.
4. Use the Big Brush to paint your favorite background and stamping it over your background.

5.- Elige ahora entre las formas precortadas de Linnie Blooms aquellas que más te gusten, en mi caso, los corazones, los círculos y la estrellita, coloréalos con tus Gelatos y pégalos sobre tu trabajo.
5. Choose your favorite Linnie Blooms canvas dies, in my case, hearts, circles and star, color them with your Gelatos and placed on your work.
6.- Por último, dibuja y pinta una muñequita a tu gusto o busca alguna imagen que te inspire e imprímela!
6. Finally, paints a doll to your liking, or search any image that inspires you and print it!


En estos primeros planos se observan los dies en canvas de Linnie Blooms (corazones, círculos y estrella), geniales para nuestros proyectos Mixed Media y facilísimas de pintar o teñir, en este caso, las he pintado con Gelatos.
In these close ups, we can observed canvas dies from Linnie Blooms,great for our Mixed Media projects and easy to painting or inking, in this case, I have painted them with Gelatos.
Productos usados / Products used:
In these close ups, we can observed canvas dies from Linnie Blooms,great for our Mixed Media projects and easy to painting or inking, in this case, I have painted them with Gelatos.
Productos usados / Products used:
- Faber-Castell: Gelatos 15c. Brights, Texture Cards, Whipped Spackle, Stamper´s Big Brus 3ct Red and Stencils 10 ct 201 Collection.
Recuerda, no dejes de participar en nuestro Blog Hop ya que tú podrías ser nuestra ganadora!! Tienes todas las instrucciones de cómo hacerlo en el Blog de Linnie Blooms (AQUI).
Remember, be sure to participate in our Blog Hop because you could be our winner !! You have all the instructions on how to participate in the Blooms Linnie Blog (HERE).

Corre!! Tú proximo paso es visitar el blog de Mayoori, sus trabajos son una pasada!!
Here's the list of links to all of the designer's posts for the hop. If at any time you get lost, don't hesitate to come back here to find your way to creativity!
Feliz comienzo de semana!!! Have a great week!

Nice job. Like the hearts and butterflies. Thank you for sharing.
ResponderEliminarWow! Fabulous job! Love all the different textures! :)
ResponderEliminarWow! Lots of great techniques on this. Well done.
ResponderEliminarLove all the texture in this project! Thanks for the ideas!
ResponderEliminarHow adorable - and I love the terrific background!
ResponderEliminarFun!
ResponderEliminarGreat project I love dolls too!
ResponderEliminarLove all of this!
ResponderEliminarLove the colors!
ResponderEliminarpretty colors and textures , loved your tip about embossing powders on the whipped speckle and heating to get embossed effect !!
ResponderEliminarhttp://kalasirjana.blogspot.in/
So many techniques! Love the background blend of colors!
ResponderEliminarSo fun and cute. Thanks for sharing.
ResponderEliminarPrecioso! Arriba el color!
ResponderEliminarQue chulo!!! Y que colorido todo!!! Me encantó! !!
ResponderEliminarQue chulo!!! Y que colorido todo!!! Me encantó! !!
ResponderEliminarQue chulo!!! Y que colorido todo!!! Me encantó! !!
ResponderEliminarPrecioso!
ResponderEliminarPrecioso!
ResponderEliminarSo adorable! Love
ResponderEliminarthe colors and the
design.
Carla from Utah
Super cute canvas!
ResponderEliminarLove the different textures and colors!! Thank you!!
ResponderEliminarFabulous textures and especially love the doll at the end!
ResponderEliminarIt looks like you had tons of fun on this one! Great project Noe!
ResponderEliminarGenial como siempre Noe!! Tus fondos me chiflan..
ResponderEliminarMe encanta todo!!! Felicidades por tu trabajo!!!
ResponderEliminarMucho bonita! I love the colors! The texture paste with the embossing powder is one technique that I will have to try!
ResponderEliminar